Saturday, February 28, 2009

Just Chickin' In... ; )


Good morning! Today, I'm sharing a card that I've made as a sample for our Clear Dollar Stamps Weekend Color Challenge, held over at Paper Craft Planet this weekend! The CDS Weekend Color Challenge is a great time to enjoy stamping while seeing what others in the challenge group have created for the same color challenge. The challenge begins each Friday evening and you have until Sunday evening to complete and upload your card submission. That's a lot of time to be challenged and a lot of time to get inky! I hope that you'll join me this weekend, as I am the hostess this week. If you'd like to join the CDS Weekend Color Challenge on Paper Craft Planet, just follow this link, for more details.

The colors that I've chosen for this week's CDS Weekend Color Challenge are Stampin' Up!'s Real Red, Summer Sun, Black and White, as an Optional Neutral. If you do not have any Stampin' Up Inks or cardstock, you can still participate in the color challenge. Just use similar shades of the 3 colors mentioned, and you can refer to my card sample photo above, if you're not sure. Remember, you have all weekend to create something beautiful, and the most important thing is that you enjoy!

I picked these particular colors for the Weekend Color Challenge because I had ordered the "Farm Critters" set from Clear Dollar Stamps last month, but have yet to ink it up! I was dying to stamp with the chicken in the set. I love this chicken! So many cute possibilities with him! Okay...only with the deets:

Stamp Sets Used: Clear Dollar Stamps "Farm Critters"
Cardstock & Papers: Making Memories Red & White Polka Dotted Scrapbook Paper (from my scrap pile), K&Co. "Remake" Sunset Yellows DP Mat Pad, Sei Black Orchid DP, Paper Trey White Cardstock
Inkpads: Memento Tuxedo Black Ink, Stazon Black Ink, Stampin' Up! Barely Banana and Summer Sun Inks
Markers: Copic Sketch Markers: BG000 Pale Aqua, R27 Cadmium Red, Y15 Cadmium Yellow, Y21 Buttercup Yellow, Y26 Mustard, YR24 Pale Sepia, E25 Caribe Cocoa, C3 & C7 Cool Greys, Signo White, Red and Black Gel Pens
Accessories: Cuttlebug, Cuttlebug Spots & Dots Embossing Folder, Nestabilities Regular Round & Scalloped Round Dies, Nestabilities Tags Trio Die, Sewing Machine, Thread, Tsukineko Sponge Daubers, Fiskars Shaper Scalloped Scissors, 3M Foam Tape, Adhesives, Zots, Spare Parts Buttons.
Coloring Medium: Copic Coloring and Blending
Special Techniques: Basic Stamping, Sponging, Dry Embossing, Machine Stitching

INSTRUCTIONS:
A 5"x 10" card base was cut from Paper Trey White Cardstock and set aside. Three square mats were cut to size: Black 4.5", Yellow 4", and Red 3.25". A black and white patterned horizontal strip was cut to 4" wide x 1-1/8" high, a black horizontal strip to 4" wide x 1.25" high and a white horizontal strip was cut to 4" wide x 1/5". Using Fiskars Paper Shaper Scalloped Scissors, I cut along both 4" sides of the white horizontal strip. The black and white patterned horizontal strip was glued to the solid black horizontal strip and then they were glued to the white horizontal strip that had a scalloped edge on either side. Using a Cuttlebug and the Spots & Dots Embossing Folder, I dry embossed the square yellow mat.

Using my Janome Hello Kitty Sewing Machine ; ) ... I machine stitched along all four sides of the square yellow and red mats. The black, yellow and red square mats were all glued togehter, and then, the stacked black & white patterned horizontal strip with the white scalloped edges was stitched to the stacked, sewn and glued square mats.

The chicken was stamped with Memento Tuxedo Black Ink onto Paper Trey White Cardstock. I colored the chicken and blended the colors using Copic Sketch markers. A black circular scalloped mat was cut using the Nestabilities Scalloped Round Die, and a white circular larger mat was cut using the Nestabilities Regular Round Die. I glued the stamped and colored chicken mat to the black circular mat, and then to the larger white circular mat. Using a Signo White Gel Pen, I dot-doodled around the circular black mat. Using a Signo Red Gel Pen, I scribble-line doodled around the chicken's white circular mat. These 3 circular mats were then popped up overtop the card front using 3M Foam Tape squares.

The sentiment was stamped onto Paper Trey White Cardstock using Stazon Black Ink. Using the Cuttlebug and the Nestabilities Tags Trio die, I cut out the sentiment. With a Tsukineko Sponge Dauber, I lightly sponged around the edge of the sentiment tag using Stampin' Up! Barely Banana Ink, and then again, more heavily, using Stampin' Up! Summer Sun Ink. Using a Signo Black Gel Pen, I dot doodled around the sentiment tag for interest. I popped up the sentiment tag overtop the card front, flush with the circular chicken mats. Two red buttons were added to the sentiment tag sides for more interest. Using the Signo Red Gel Pen again, I scribble-line doodled along the 4 sides of the white card front. To finish the card front was glued to the 5"x10 white cardstock base.

Friday, February 27, 2009

CDS Weekend Color Challenge Today!


Good Morning! Lots going on over at Clear Dollar Stamps today...Sneak Peeks and a Monthly Designer Challenge (see details below), AND! Our CDS Weekend Color Challenge held today over on Paper Craft Planet. This challenge is unique to all others, in that it begins on Friday afternoon and continues through Sunday evening each week! That gives us stampers an entire weekend to make something beautiful! I'll be posted my sample card for the CDS Weekend Color Challenge tomorrow morning (Saturday), to share. I'm hostessing the Weekend Color Challenge this weekend, so if you have some Clear Dollar Stamps and want to play along, I'm so glad that you do -- follow this link for details! See you later for that...

Sneaking a Peek at "Beautiful Butterflies"


I want to remind readers today, in case they didn't read about it yesterday here, that we at Clear Dollar Stamps are so excited about the next venture that awaits one lucky challenge submission. Starting this month, and starting today through the end of this month, February 28th, CDS is offering a new Monthly Guest Designer Spot Challenge, and YOU could be the next Guest Designer for one month! The chosen winner will be the Guest Designer for CDS for the next release month (in March!), and will receive three stamp sets FREE of his/her choice from the stamps that are released in March! How exciting is that? If you think that you'd like to submit a card for this great opportunity, please DO YOUR BEST WORK, and for more details, see Lori McCroskey's blog, here.

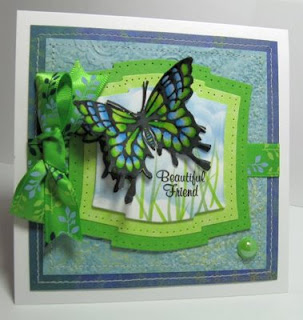
Today I showing you a gorgeous new stamp set called "Beautiful Butterflies" by Clear Dollar Stamps to be released on March 1st. This set has many styles and sizes of butterflies ranging from realistic to stylized ones in silhouette. Also, are a good selection of very sweet sentiments to go with the stamps. This set, I think, is going to be one of my favorites because of it's versatility. I can see using this for birthdays, thinking of you, sympathy, get well and so much more! This card was a joy to make, as the large butterfly is so much fun to color and with all the butterflies in the world, there are many color possibilities to work with! I know that you love this set once you see it. Ordering and pricing details may be found here. Be sure to see my team members' blogs, Candy, Kim, Laurie, Monique and Stacy for their beautiful samples using "Beautiful Butterflies".

Stamp Sets Used: Clear Dollar Stamps "Beautiful Butterflies"
Cardstock & Papers: K&Co. "Remake Grass Greens" Mat Pad, K&Co "Mira" Designer Paper Mat Pad, K&Co. "Que Sera, Sera" Designer Paper, Paper Trey White Cardstock
Inkpads: Memento Tuxedo Black Ink, Stampin' Up! Bashful Blue
Markers: Copic Sketch Markers: B05 Process Blue, B32 Pale Blue, G07 Nile Green, G82 Spring Dim Green, YG03 Yellow Green
Accessories: Cuttlebug, Cuttlebug Perfect Paisley Embossing Folder, Nestabilities Labels Two Dies, Piercing Tool, Sewing Machine, Thread, Adhesives, American Crafts Dimensionals, Judi-Kins Diamond Glaze, Cloud Template, Michael's $1 Bin Ribbon, K&Co. "Que Sera, Sera" Self-Adhesive Gems
Coloring Medium: Copic Coloring and Blending
Special Techniques: Basic Stamping, Machine Stitching, Paper Piercing, Paper Tole, Sponging

INSTRUCTIONS:
A 5"x 10" card base was cut from Paper Trey White Cardstock and set aside. Two square mats were cut to size: dark blue to 4.5" and the light blue to 4". Using my Cuttlebug and the Cuttlebug Perfect Paisley Embossing Folder, I ran embossed the light blue square mat. I machine stitched around all four sides of each of the two blue mats, after gluing them together and set aside.

Next I cut 3 progressively sized mats using Nestabilities Labels Two die cuts: a small white one out of Paper Trey White Cardstock, a lime green one and a grass green one, out of K&Co. "Remake Grass Greens" Mat Pad. On another piece of Paper Trey White Cardstock, I stamped the larger butterfly twice. Using Copic Sketch Markers, I colored both butterflies identically the same and cut them each out and set aside. On the small white Nestabilities Labels Two die white mat, using Copic Sketch Markers, I freehand drew some grass in two shades of green on the bottom of the mat. Using a cloud template and a Tsukinkeo Sponge Dauber and Stampin' Up! Bashful Blue Ink, I sponged "clouds in the background. I then glued one of the butterflies in place on top of the white Labels Two die mat. I added Judi-Kins Diamond Glaze to the other colored, cut out butterfly to the colored areas to add interest and let dry. While that was drying, using a paper piercing tool, I hand pierced around the edge of both of the two green Labels Two die cut mats. Then I glued those 2 mats together. I then popped up the white mat with the clouds and butterfly finished, overtop the two green die cut mats using American Crafts Dimensionals.

To embellish, I added a pretty green print ribbon that I found at the Michael's $1 Ribbon Bin by gluing a ribbon strip across the middle of the card and anchoring to the back of the card front. The two Labels Two Die cut Mats were then popped up over the ribbon strip using American Crafts Dimensionals again. The Diamond Glazed colored, cut out butterfly was glued overtop the underneath butterfly on the small die cut white mat. As an extra embellishment and for balance I added a K&Co. "Que Sera, Sera" Self-Adhesive Gem to the bottom right corner. The card front was then glued to the 5" x 10" Paper Trey White Cardstock card base.


This is the second card that I made using the "Beautiful Butterflies" stamp set by Clear Dollar Stamps. I came up with this color scheme by using the color scheme tool widget that you can find on my right sidebar. The color scheme is called "Aubergine Garden", and although I'm not a Fuschia or Purple kind of gal, I really like the overall effect of these colors when put together. This stamp set is a superbly detailed set with realistic butterflies as well as stylized, silhouette type butterflies. The sentiments are very sweet in this set, too. I think that I will be inking this set up many, many times! "Beautiful Butterflies" releases on march 1st. Ordering and pricing details may be found HERE. Be sure to see my team members' blogs, Candy, Kim, Laurie, Monique and Stacy for their beautiful samples using "Beautiful Butterflies".


Stamp Sets Used: Clear Dollar Stamps "Beautiful Butterflies", Pretty Little Scriptures, Leaves, Bountiful Branches (Whew!)
Cardstock & Papers: K&Co. Colorbok Textured Brights Cardstock, Paper Trey White Cardstock
Inkpads: Memento Tuxedo Black Ink, Stampin' Up! BashfuGlorious Green, Hunter Green, Baja Breeze, and Bashful Blue Inks, Vivid Raspberry Ink
Markers: Copic Sketch Markers: BG000 Pale Aqua, BG15 Aqua, Bic Mark-It Fandango Pink Marker, Sharpie Pink and Black Markers
Accessories: EK Success Corner Photo Punch, Stampin' Up! Slot Punch, Sewing Machine, Thread, Cloud Template, Tskukineko Sponge Daubers, Adhesives, American Crafts Dimensionals, Kaisercraft Self-Adhesive Pearls: Ice Green, Green and Teal, Michael's Polka Dotted Grosgrain Ribbon
Coloring Medium: Copic Coloring and Blending
Special Techniques: Basic Stamping, Machine Stitching, Paper Tole, Sponging

INSTRUCTIONS:
A 4.25"x 11" card base was cut from Paper Trey White Cardstock and set aside. Three rectangular mats were cut to size: glorious green to 4.25"x5.5.5", fuschia to 3.75"x5" and the white center mat to 3.25"x4.25".

Using the white center mat, I stamped the ferns from another Clear Dollar Stamps set, called "Leaves", alternating Stampin' Up! Glorious Green Ink and Handsome Hunter. I added some flowers using Vivid! Raspberry Ink and using the flowers from the Clear Dollar Stamps set called "Bountiful Branches" (I get so much mileage out of this set!), Then using a Cloud Template and a Tsukineko Sponge Dauber, I sponged the clouds in the background using Stampin' Up! Baja Breeze and Bashful Blue, randomly. The sentiment is from another Clear Dollar Stamps set, called "Pretty Little Scriptures". I stamped that using Memento Tuxedo Black ink overtop the clouds. I glued the large green rectangular mat to the smaller fuschia mat and then those to the white, stamped mat. Using my Janome Hello Kitty Sewing Machine ; ) I machine stitched around all four sides of the large green rectangular mat as well as the center white, stamped mat, alternating various stitches (straight & zig-zag).

I stamped 6 of the butterflies and colored them with Copic Sketch, Bic Mark-It and Sharpie Markers. I blended the colors with the coordinating markers. I cut out each butterfly (this takes patience, now, LOL), and then glued two of the teal and black butterflies to the card front, as well as one of the fuschia butterflies. I adhered the other 3 matching butterflies that I colored and cut out using American Crafts Dimensionals, popping them up for interest. I added small and very small KaiserCraft Ice Green and Teal Self-Adhesive Pearls to the butterfly bodies for more interest. Using a EK Success Corner Photo Punch, I created the green corner embellish, adding two KasierCraft Green Self-Adhesive Pearls to balance. To embellish, I punched a hole with the Stampin' Up! Slot Punch on the side of the card, threading a Michael's Polka Dotted Grosgrain Ribbon through and around and tying off in a Bow Knot. The card front was then glued to the 5" x 10" Paper Trey White Cardstock card base.

Thursday, February 26, 2009

A Cute Charlie Horse!


Good Morning! This is Day 2 of Clear Dollar Stamps Sneak Peeks Week. I want to remind readers today, in case they didn't read about it yesterday here, that we at Clear Dollar Stamps are so excited about the next venture that awaits one lucky challenge submission. Starting this month, and starting today through the end of this month, February 28th, CDS is offering a new Monthly Guest Designer Spot Challenge, and YOU could be the next Guest Designer for one month! The chosen winner will be the Guest Designer for CDS for the next release month (in March!), and will receive three stamp sets FREE of his/her choice from the stamps that are released in March! How exciting is that? If you think that you'd like to submit a card for this great opportunity, please DO YOUR BEST WORK, and for more details, see Lori McCroskey's blog, here.

Today I have a supercute stamp set to share that will be released on March 1st by Clear Dollar Stamps, called "Charlie Daisy". This set has the popular Charlie Horse frolicking among daisies and butterflies, and the other stamps in the set include several daisies and butterflies and a floral border. "Charlie" is great fun to color in this set and with all the different daisy stamps, you can create a variety of designs.Ordering and pricing details may be found HERE. Be sure to see my team members' blogs, Alex, Alysabeth, Candy, Katie, Kim, Laurie, Monique, and Stacy for their beautiful samples using "Charlie Daisy".

Stamp Sets Used: Clear Dollar Stamps "Charlie Daisy"
Cardstock & Papers: October Afternoon DP, K&Co. "K-Ology Addison" DP, Recycled Navy Cardstock, Paper Trey White Cardstock
Inkpads: Memento Tuxedo Black Ink, Stampin' Up! Barely Banana, Summer Sun & Bashful Blue Inks
Markers: Copic Sketch Markers: Y11 Pale Yellow, Y15 Cadmium Yellow, G21 Lime Green, G28 Ocean Green, G82 Spring Dim Green, G94 Grayish Olive, B06 Peacock Blue, BG15 Aqua, YR21 Cream, E25 Caribe Cocoa, E33 Sand, E34 Orientale, 100 Black, Signo Navy Gel Pen
Accessories: Cuttlebug, Nestabilities Regular Square Dies, Nestabilities Tag Trio Dies, Stampin' Up! Mat Pack, Piercing Tool, Tsukineko Sponge Daubers, Cloud Template, EK Success Photo Corner Punch, Karen Foster Click-It Hole Punch Kit, Sewing Machine, Thread, Adhesives, American Crafts Dimensionals, Karen Foster Button Brad, Michael's Ribbons.
Coloring Medium: Copic Coloring and Blending
Special Techniques: Basic Stamping, Masking, Machine Stitching, Paper Piercing & Sponging

INSTRUCTIONS:
A 5"x 10" card base was cut from Paper Trey White Cardstock and set aside. Two square mats were cut to size: Yellow 4.75", Teal/Baja Breeze Floral Print 4.5". I glued the two square mats together, and then using my Janome Hello Kitty Sewing Machine, I stitched along all four sides of the two mats. I cut a strip of K&Co. "K-Ology Addison" Teal dp 1.75" wide x 4.5" high and glued to the left side of the two square mats. I machine stitched up the outer right edge of this strip using a zig-zag stitch. Using my EK Success Photo Corner Punch, I punched a corner mat from the coordinating yellow polka dotted dp and glued to the upper right corner.

I stamped the main focal image onto Paper Trey White Cardstock and colored with Copics Sketch Markers and blended, as well. Using the Masking Technique, I stamped another "Charlie" horse, cut it out and put it over the understamped "Charlie" horse, and while using my Cloud Template and a Tsukineko Spong Dauber with Stampin' Up! Bashful Blue Ink, I sponged the clouds in the sky around "Charlie". Using Nestabilities Regular Square Dies, I cut out the colored,.stamped focal image, as well made a navy blue mat out of recycled cardstock. The white mat around the stamped image was hand cut, as there was no Nestabilities Square Die in that size. I glued the stamped, colored image to the white and navy blue square mats and using the Stampin' Up! Mat Pack, and a paper piercing tool, I paper pierced the upper right and lower left corners of the colored, stamped image.

The sentiment was stamped onto Paper Trey White Cardstock using Memento Tuxedo Black Ink and then die cut using the Cuttlebug and the Nestabilities Tags Trio Die. Using a Tsukineko Sponge Dauber, I lightly sponged around the tag die with Stampin' Up! Barely Banana first, and then again more moderately using Stampin' Up! Summer Sun. Using a Signo Navy Gel Pen, I dot-doodled around the stamped sentiment on the die cut tag.

To embellish, I ran an 1" wide polka dotted grosgrain ribbon strip up the left vertical side of the card and anchored to the back of the card front. Running another narrower polka dotted grosgrain ribbon in teal through the die cut sentiment tag, I anchored that strip to the back of the card front, too. I added two matchng polka dottag grosgrain ribbon bow knots to the ribbon strip. The stamped, colored image was popped up overtop the wider polka dotta grosgrain strip using American Crafts Dimensionals. Then I added a Karen Foster Button Brad (these, are adorable and are a combination of a button on a brad -- so cool!) to the upper right corner mat. To finish, I glued the card front to the 5"x10" white cardstock base..

This is the second card that I created with the soon-to-be-released "Charlie Daisy" by Clear Dollar Stamps. Believe it or not, I have never made a card that is vertically tall! I was challenged by Laurie Wilson's Sketch Challenge for our design team, and her sketch used a tall card, so I gave it whirl. I think that I didn't do them before because I was worried about having a matching sized envelope! LOL A legal sized envelope will accommodate this card just fine.

This stamp set has several smaller stamps to use for background stamping, and I also created this card for another challenge - A "No Designer Paper Challenge". I used two of the single flower stamps and the flower bunch stamps along with one of the butterfly stamps to create the lower 2/3'rds of the card background. I have become addicted to making my own designer paper!

My design teammate, Katie Renz, has a fabulous tutorial on creating designer paper or as some call it, background stamping. Okay...on with the deets! You can purchase this stamp set on March 1st at Clear Dollar Stamps and ordering and pricing details may be found HERE. Be sure to see my team members' blogs, Alex, Alysabeth, Candy, Katie, Kim, Laurie, Monique, and Stacy for their beautiful samples using "Charlie Daisy".

Stamp Sets Used: Clear Dollar Stamps "Charlie Daisy"
Cardstock & Papers: Colormates Medium Merri-Gold & Medium Autumn Red Cardstocks, Generic Black Cardstock, Paper Trey White Cardstock
Inkpads: Memento Tuxedo Black Ink, Stampin' Up! Summer Sun, Real Red, & Mellow Moss Inks and Summer Sun Re-Inker
Markers: Copic Sketch Markers: Y15 Cadmium Yellow, Y26 Mustard, R29 Lipstick Red, G21 Lime Green, YG67 Moss, C1 & C5 Cool Greys, 100 Black, Signo White Gel Pen
Accessories: Cuttlebug, Cuttlebug Swiss Dots Embossing Folder, Nestabilities Regular Square Dies, Tsukineko Sponge Daubers, Karen Foster Click-It Hole Punch Kit, Sewing Machine, Thread, Adhesives, American Crafts Dimensionals, Yasutomo Aquabrush, We R Memory Keepers Extra Large Eyelet, Making Memories Decorative Brad, Offray 1" Red & White Polka Dotted Grosgrain Ribbon.
Coloring Medium: Copic Coloring and Blending, Watercoloring
Special Techniques: Basic Stamping, Masking, Machine Stitching, Sponging, Dry Embossing

INSTRUCTIONS:
A 3.75"x 7.5" card base was cut from Paper Trey White Cardstock and set aside. The card front was created by cutting a panel of Paper Trey White Cardstock to 3.75" wide x 4.25" high, and a panel from Colormates Medium Merri-Gold Cardstock to 3.75" wide x 3.5" high, and a black strip from Generic Black Cardstock to 3.75" wide x 3/8" high. Using Memento Tuxedo Black Ink, I randomly stamped the daisies, the flower bunch and butterfly over the White Paper Trey Cardstock cut panel, and then using Copic Sketch Markers, colored the stamped images in. The yellow cut panel was run through the Cuttlebug Swiss Dots Embossing Folder, then I glued the yellow embossed panel, to the black strip to the stamped, colored white panel to form the card front. I glued a strip of 1" wide Red & White Polka Dotted Ribbon across the lower apart of the yellow embossed panel and secured to the back of the card front. Using my Janome Hello Kitty : ) Sewing Machine, I stitched along all four sides of the card front alternating straight stitches with an occasional zig-zag stitch.

I stamped the main focal image onto Paper Trey White Cardstock and colored with Copics Sketch Markers and blended, as well. I wanted to make "Charlie" a black and white Appaloosa type horse for a change, so I colored him with Copic shades of black and cool greys. I stamped "Charlie" horse again as well as the butterfly on his nose, and colored identically with Copic Sketch Markers, and cut them both out and set aside. Using Nestabilities Regular Square Dies, I cut out the colored,.stamped focal image, as well as made a black scalloped square mat. The inside red mat was cut by hand to 2.5" square, as I didn't have a Nestabilities square die to that size. The stamped, colored image was glued to the red mat, and then to the black scalloped mat. Using my Janome Hello Kitty Sewing Machine : ) again, I machine stitched around all four sides of the stamped, colored image. I added the extra stamped and colored "Charlie" horse and butterfly to the stamped, colored image by adhering with American Crafts Dimensionals for extra dimension and interest.

The sentiment was stamped onto Paper Trey White Cardstock using Memento Tuxedo Black Ink and then I hand cut the sentiment shape out using a straight edge and an Xacto knife. I sponged lightly around the edges of the sentiment tag using Tsukineko Sponge Dauber and Stampin' Up! Mellow Moss Ink. I machine stitched around the edge of the sentiment tag, as well, then glued to the card front. I punched a hole in the sentiment tag.using a Karen Foster Click-It Hole Punch Kit to accommodate the We R Memory Keepers Extra Large Eyelet to thread the Offray 1" Wide Red & White Polka Dotted Ribbon through. I added the stamped, colored and matted image to the card front using American Crafts Dimensionals. To embellish, I added a Making Memories Black Decorative Brad to the upper left corner for balance. To finish I glued the finished card front to the 3.75" wide x 7.5" Paper Trey White Cardstock base.

Wednesday, February 25, 2009

"Let's Toast!" Great News & Sneak Peeks!

Good morning! Today I have a some very exciting news to share with you, as well as a preview of a soon-to-be-released stamp set in March. First, we at Clear Dollar Stamps are so excited about the next venture that awaits one lucky challenge submission. Starting this month, and starting today through the end of this month, February 28th, CDS is offering a new Monthly Guest Designer Spot Challenge, and YOU could be the next Guest Designer for one month! The chosen winner will be the Guest Designer for CDS for the next release month (in March!), and will receive three stamp sets FREE of his/her choice from the stamps that are released in March! How exciting is that? If you think that you'd like to submit a card for this great opportunity, please DO YOUR BEST WORK, and for more details, see Lori McCroskey's blog, here.

Now, to preview a very cute and whimsical kitchen stamp set, called "Kitchen Clutter by Clear Dollar Stamps, to be released on March 1st. This set has several images including, a tea kettle, sugar and creamer, dish soap, bubbles, sponge, coffee pot, cannister jarsand more! This set is so much fun to stamp with with endless possibilities for stamping and much more fun than cooking! Ordering and pricing details may be found HERE. Be sure to see my team members' blogs, Laurie, Linsey and Candy for their beautiful samples using "Kitchen Clutter".

All Stamp Sets Used: Clear Dollar Stamps "Kitchen Clutter"
Cardstock & Papers: Bazill Solid Cardstocks, My Minds Eye "My Sunshine Sunny Days" & "My Sunshine Blooming Lovely", Paper Trey White Cardstock, Swarthmore Watercolor Paper
Inkpads: Memento Tuxedo Black, Stampin' Up! Apricot Appeal and Only Orange Inks Markers: Copic Sketch Markers: Y11 Pale Yellow, Y21 Buttercup Yellow, R59 Cardinal, BG000 Pale Aqua, C1, C3, C5 Cool Grays
Accessories: Cuttlebug, Cuttlebug Swiss Dots Embossin Folder, Nestabilities Regular Round & Large Pinking Round Dies, Piercing Tool, Tsukineko Sponge Daubers, Kaisercraft Self-Adhesive "Bliss" Pearls, Adhesives, Zots, Sewing Machine, Thread, Marvy Corner Rounder Punch, Offray Satin Ribbon, Crystal Effects
Coloring Medium: None
Special Techniques: Basic Stamping, Sponging, Copic Coloring & Blending, , Dry Embossing, Machine Stitching, Paper Piercing

INSTRUCTIONS:
A 5"x 10" card base was cut from Paper Trey White Cardstock and set aside. Three square mats were cut to size: Plaid 5", Burgundy 4-3/8", Floral Print 4-1/8". A yellow horizontal strip was cut to 4-1/8" wide x 1-1/8" high, and a brown border was cut to 4-1/8" wide x 1-5/16" high. Using a Marvy Corner Rounder Punch, I clipped the bottom left and right corners of all 3 mats. Using a Cuttlebug and the Swiss Dots Embossing Folder, I embossed the yellow horizontal strip. Using a Stampin' Up! Slot punch and after marking the center of the brown horizontal strip, I starting punching from the center outward, first to the right and then to the left so that the scallops on the border were be balanced and centered. I paper pierced 3 decorative holes in each of the brown scallop points. I glued the plaid, the burgundyand floral mats together, and then glued the yellow horizontal swiss dot embossed strip along with the brown horizontal scalloped border together and then on top of the 3 glued mats. Using my Janome Hello Kitty Sewing Machine ; ) I machine stitched around the 4 sides of the larger, plaid mat and the floral mat with the yellow horizontal strip at the bottom.

The sentiment was stamped onto Paper Trey White Cardstock using Memento Tuxedo Black Ink. Using a Marvy 1.5" circle punch I punched out the sentiment, cutting it about 3'4 from the top of the circle, horizontally. Using a paper piercing tool, I hand pierced around the semi circle sentiment mat, and then, using Stampin' Up! Apricot Appeal ink, I lightly sponged around the semi-circle and then again, a little more heavily using Stampin' Up! Only Orange. I glued the sentiment to the yellow horizontal swiss dot embossed strip.

The stamped focal image, the toaster was stamped onto Swarthmore Watercolor Paper, and colored with Copic Sketch markers and blended. Using Nestabilities Regular Round Die, I cut out the stamped image, and then using a paper piericng tool, I hand pierced around the circular focal image. I cut a pinked circle burgundy mat for the stamped image using the Nestabilities Large Pinking Circle Die Set. I added Crystal Effects to the toaster to add dimension and interest to the toaster. I glued the stamped toaster image to the burgundy pinked mat and set aside. Using Offray Brown 5/8" wide Satin Ribbon, I glued down a ribbon strip veritcally down the right side of the card, anchoring it to the back of the largest mat. I "v-eed" the end of the ribbon by folding the ribbon in half, and cutting a slant cut from the folded edge outward. I popped up the matted, stamped toaster image overtop the Offray Brown Satin Ribbon strip, and then added two bow knots to the ribbon strip above the stamped image. Using thread, I anchored sewed the three button embellishments and then adhered them to the card front using Zots. To finish, I added Kaisercraft Self-Adhesive "Bliss" Pearls to the flower centers of the floral print interior mat. The card was finished off by gluging the card front to the 5"x 10" white cardstock card base.
This is the second card that I've made with "Kitchen Clutter" a pre-release stamp set by Clear Dollar Stamps, to be released on March 1st! This set is so much fun to create with and is great for retro kitchen designer paper, as well. This unique stamp set offers many cute "kitchen clutter" items such as a toaster, a sugar and creamer, a dish soap bottle and sponge, bubbles, cooking spoons and so much more! Ordering and pricing details may be found HERE. Be sure to see my team members' blogs, Laurie, Linsey and Candy for their beautiful samples using "Kitchen Clutter".

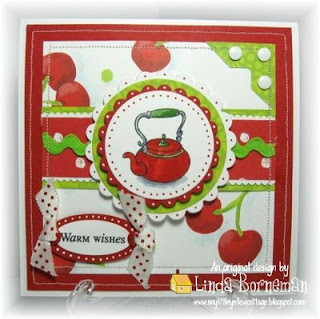
Stamp Sets Used: Clear Dollar Stamps "Kitchen Clutter"
Cardstock & Papers: Colormates Medium Autumn Red, K&Co. "Berry Sweet" Designer Paper Mat Pad, Creative Imaginations "Renae's House" Line, Paper Trey White Cardstock
Inkpads: Memento Tuxedo Black Ink
Markers: Copic Sketch Markers: R18 Vermillion, $27 Crimson Red, G82 Spring Dim Green, BG67 Moss, C# & C% Cool Grays, 0 Colorless Blender, Signo Red & White Gel Pens
Accessories: Cuttlebug, Nestabilities Regular Round Dies, Fiskars Mini Scalloped Shaper Scissors, EK Success Photo Corner Punch, Stampin' Up! Small & Large Oval Punches, Karen Foster Click-It Hole Punch Kit, Sewing Machine, Thread, American Crafts Extra Large Eyelet, Colorbok Adhesive Dots, Adhesives, American Crafts Dimensionals, American Crafts Grosgrain Polka Dot Ribbon
Coloring Medium: Copic Coloring and Blending
Special Techniques: Basic Stamping, Machine Stitching, Paper Piercing

INSTRUCTIONS:
A 5"x 10" card base was cut from Paper Trey White Cardstock and set aside. Two square mats were cut to size: Red 4.75", Cherry Print 4-1/8". Then I cut 3 horizontal strips to size: Green Patterned Paper 4-1/8" wide x 1/5" high, white 4-1/8" wide x 1.25" high and red & white polka dott 4-1/8" wide x 1-1/16" high. The red mat was glued to the cherry print mat. Using Fiskars Mini Scalloped Shaper Scissors, I cut a scalloped edge along the top and bottom of the white strip. I then glued the green patterned strip to the white scalloped strip, and then glued the red & white polka dotted strip to the top of all 3 strips. Using Doodlebug Limeade Ric Rac, I tacked it down across the middle of the red & white polka dotted horizontal strip..Then gluing the 3 layered horizontal strip across the two glued square mats, and then using my Janome Hello Kitty Sewing Machine ; ) I machine stitched around the 4 sides of the red mat and the cherry print mat, and set aside.

I stamped the main focal image, the teapot onto Paper Trey White Cardstock and colored with Copics Sketch Markers and blended, as well. Using Nestabilities Regular Round Die, I cut out the colored,.stamped focal image. I made a scalloped red mat out of Colormates Medium Autumn Red Cardstock using the Nestabilities Scalloped Round Die, and then another mat out of K&Co. "Berry Sweet" lime patterned dp using the Nestabilities Regular Round Die, and then a third mat out of Paper Trey White Cardstock using Nestabilities Round Scalloped Die, once more. Using Signo Red and White Gel Pens, I dot-doodled around the two scalloped image mats, as well as the image mat, itself.
I glued the white image mat to the red scalloped mat, and then glued the lime patterned circle mat to the white scalloped circle mat. I then popped up the two mats (image mat and red scalloped mat) overtop the two other mats (the lime patterned circle mat and the white scalloped circle mat).

The sentiment was stamped onto Paper Trey White Cardstock using Memento Tuxedo Black Ink and then punched out using the Stampin" Up! Small Oval Punch, and then made a red oval mat out of Colormates Medium Autumn Red and punched out with the Large Stampin' Up! Oval Punch. Using a White Signo Gel Pen, I dot doodled around the red mat oval. I glued the smaller white oval sentiment mat to the larger red oval mat. Using a Karen Foster Click-It Hole Punch kit, I punched two holes on either side of the sentiment mat and then attached Extra Large Eyelets from American Crafts to the holes. Threading American Crafts Red & White Polka Dot Grosgrain Ribbon through each hole, I tied it off into two bow knots. I anchored the bowed, matted sentiment to the card front using American Crafts Dimensionals, popping it up for dimension. To finish, the card front was glued to the white cardstock base.
Monday, February 23, 2009

A little tip and a little excitement...


SNEAK PEEK WEEK
BEGINS WEDNESDAY!

Good evening all! I had a late start to my day, but wanted to post a little tip that I think is useful to most stampers and to share a little excitement.

First, for the tip: When stamping an image that you are going to pop up overtop the same identical image or using "Paper Tole", as some call it, here's a handy tip. Do you get annoyed with that white interior of the cardstock after you've cut out a stamped colored image? You know the core of the cardstock? Especially, when you have stamped the image in black ink? Well, here's a quick fix: After cutting out the stamped, colored image that you're going to pop up over the underside image, take a Black Marker (I like to use a Black Sharpie) and "edge" along the entire cut-out stamped image edge before adhering to the matching underside image. Be very careful not to mark on the top of the stamped, colored image, or you will have to redo that...and who wants that? Just a little tip, and when it's popped up over the underside image, you won't see that annoying white core edge peeking out.

Now, the Excitement: this is Clear Dollar Stamps Sneak Peek Week! I have 3 new stamp sets to showcase this week, starting on Wednesday, February 25th! So, I hope that you'll come back to visit and see all the excitement brewing at Clear Dollar Stamps.

Friday, February 20, 2009

A Dental Emergency and A Little Love

Good morning all! So sorry that I've not been sharing anything new since Valentine's Day. I have had a dental emergency that has disrupted my entire week, unfortunately and will be back on my feet in a few days with prayer. Not to worry, God is good -- all the time!

My friend, Oliva Ohlson, who also was my "Little Sister" during a round of Divine Secret Siblings over on Splitcoast Stampers Community, surprised me with a sweet email and a little honor this morning. After this week, I sure could use some cheering up! LOL Oliva has the sweetest and kindest heart and she is always encouraging me in stamping. She is also an addicted stamper and her wonderful work can be viewed on her blog, here.

Thank you Oliva for the blog award. You are truly an angel. Love you!

Now I have to choose 5 fellow bloggers to share the award with. Now, that, in and of itself, is a difficult task. When I think of whom to bestow the award, my mind races with excitement over quite a few to surprise. I have chosen the following five people for this blog honor:

Beth Hartley - This girl cranks out projects like a machine, but each one is handcrafted uniquely and beautifully. Beth has the sweetest spirit and she is a dear friend.

Lori Garrison - This woman is a supermom, beautiful stamper, Pampered Chef demo, homeschools her children, keeps her husband in line and cheers everyone up over on Splitcoast Stamper Community. Lori is one of my favorite people in the world.

Linda Anderson - Now, this is another special friend. Linda and I met through Splitcoast Stampers Community, as well. We both participated in the Divine Secret Siblings and she was my "Big Sister" for three months, and a wonderful one, at that. She lavished me with stamping goodies, galore! Linda's work is beautifully crafted with lots of layers and dimension. I love her work, and I love her, too.

Monique Hawrelluck - Talk about talent all over the place! Monique is a fellow team designer for Clear Dollar Stamps and we have just begun our friendship. I am always amazed at Monique's blog when I visit, because each one of her cards are beautifully and thoughtfully crafted with such detail and embellishment. You will love viewing her work.

Lorelie Kim -- Another talented lady! Lorelie and I met through Clear Dollar Stamps, as fellow team designers. Lorelie now designs for Our Daily Bread Designs and I'm telling you! If you want to see works of art, check out her blog! Lorelie, is another sweet spirit and she always makes you feel like your stamping is appreciated. LOL Lorelie, I love your work and I love you, too!

Okay, that's it! I wish I could pass it on to more, as I have so many more in my heart that love and admire...

Blessings!

Saturday, February 14, 2009

Sausage Anyone? LOL

Hello and thanks for coming back! I hadn't posted anything lately, and I was worried that any blog followers might lose interest (while I was busy creating March sneak peeks for Clear Dollar Stamps). But, I was able to play along with the Clear Dollar Stamps Weekend Color Challenge over on Paper Craft Planet this weekend, and Laurie Wilson is hostessing and substituting for Alex Maldonado (my fellow design team member), who is sick with bronchitis. Laurie chose the following colors: Pink Pirhouette, Regal Rose and Baja Breeze with white as an optional neutral.

I have four stamping friends with March birthdays, and I wanted to use the pig in the CDS "Farm Critters" stamp set for one of the birthday cards...turns out Laurie used the same pig stamp for color challenge sample. But what better stamp to use for those two shades of pink, other than a pig? Anyway, I wanted to created my own designer paper for the card, and I wracked my brain trying to come up with some to stamp a background with, that would tie in with a pig. Then, I had light bulb moment! I had a sausage stamp! I had never inked it up, but decided to go ahead and use it for the background stamping for this card. The sausage stamp comes from a Stamp of the Month stamp set from Clear Dollar Stamps. I thought that the whole concept of a pig, sausage and oinking worked, quite well! LOL Okay...the deets:

Stamps Used: Clear Dollar Stamps "Farm Critters" and "May 2008 Stamp of the Month" Stamp Sets
Cardstock: Colormates Light Pretty Pink and Dark Pretty Pink Cardstock, Paper Trey White Cardstock
Ink: Memento Tuxedo Black, Stampin' Up! Baja Breeze Ink
Markers: Copic Sketch Markers: RV11 Pink, RV23 Pure Pink, R29 Crimson, BG000 Pale Aqua, BG72 Ice Ocean, Signo White Gel Pen
Accessories: Cuttlebug, Nestabilities Regular Round Dies, Nestabilities Large Pinking Circles, Marvy Mega and Large Circle Punches, Piercing Tool, Karen Foster Click-It Hole Punch Kit, Tsukineko Sponge Daubers, Sewing Machine, Thread, Adhesive, Zots, American Crafts Dimensionals, American Crafts Photo Anchor & Brad, Pink Twine, Spare Parts Buttons, Judi Kins Diamond Glaze
Technique: Basic Stamping, Sponging, Paper Tole, Machine Stitching, Paper Piercing, Copic Coloring and Blending

DIRECTIONS:
A card base was cut to 7.5" wide x 8" high from Paper Trey White Cardstock and set aside. Four rectangular mats were cut for the card front to size: White to 3.75" wide x 8" high, Light Pretty Pink 3-3/8" x 7.5" high, Dark Pretty Pink 3" wide x 7-3/16" high, and the smaller white 2/75" wide x 7" high. Using the smaller white rectangular mat, I stamped random sausages using Memento Tuxedo Black ink and then colored with Copic Sketch markers. Using Judi Kins Diamond Glaze, I applied glaze to each sausage to create a glazed, elevated effect.

The pig image was stamped onto Paper Trey White Cardstock twice and colored identically with Copic Sketch Markers and blended, as well. One of the colored pig images was cut out using the Nestabilities Regular Round Die, and then using a Tsukineko Sponge Dauber, I moderately sponged around the edge of the die cut circle using Stampin' Up! Baja Breeze Ink, and then when dry, using a Paper Piercing Tool, I pierced around the circle edge to embellish. I punched a mat out of the Light Pretty Pink Cardstock using a Marvy Mega Circle Punch, and then cut a larger circular mat using the Nestabilities Large Pinking Circle Die out of Dark Pretty Pink Cardstock. Using a Signo White Gel Pen, I dot doodled each pinking point on the larger mat. I then cut out the second stamped, colored pig and popped it up over the underneath stamped, colored pig, using American Crafts Dimensionals. I then glued the colored image mat, to the larger light pink mat and then to the darker pink mat and set aside.

The sentiment was stamped with Memento Tuxedo Black Ink onto Paper Trey White Cardstock using the Nestabilities Regular Round Die, and then using a Tsukineko Sponge Dauber, I moderately sponged around the edge with Stampin' Up! Baja Breeze Ink, and paper pierced around the edge to embellish. I cut two pink mats to enhance the sentiment using Nestabilities Regular Round and Large Pinking Round Dies. I paper pierced around the lighter pink mat edge, and then using the Signo White Gel Pen again, dot doodled around the pinked points on the larger pink sentiment mat. I glued the sentiment circle to the two pink circular mats and set aside.

I did something that I don't normally like to do. I took the sentiment "Something to Oink About" and it cut it apart to "free" the "oink" word. I wanted to stamp "Oink" randomly in between the sausages on the background stamped mat. So, using Memento Tuxedo Black Ink again, I randomly stamped "Oink" in between some of the sausages.

I punched two circles using a Marvy Large Round Punch, and tied two buttons from Spare Parts two the punched pink circles with pink jewelry twine...tying each button with a bow.

Using my Janome Hello Kitty sewing machine ; ) I machine stitched around all four sides of the lighter pink card front mat and then again on the inner white, stamped and colored "sausage and oink" mat using straight stitches and alternating with a zig-zag stitch. If you look closely, you'll see where I messed up and stitched the straight stitch with a tighter stitch in two areas. Oh well...it is handcrafted, right? LOL

Okay, to finish up the card. I popped up the stamped, colored and matted pig image onto the card front using American Crafts Dimensionals. Adding an American Crafts Decorative Photo Anchor and Matching Brad, I punched a hole through the card front and anchored the pig mat to embellish. I adhered the two button circles to the card front using Zots adhesive and then adhered the stamped, matted sentiment circle using American Crafts Dimensionals, again. To complete the card, the card front was glued to the 7.5" wide x 8" high card base.

Thursday, February 12, 2009

Up to my ears...


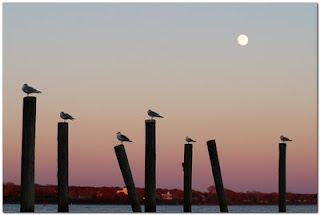
Good morning! It is blustery cool here on the Chesapeake Bay today. Spring did seem to be in the air, but today was a good reality check that it is still February...just ask the seagulls in the above photo! My husband, Tom, who is an avid digital photographer took this photo of our hometown and it's one of my favorites. We live on the water with a "Promenade Boardwalk" that spans a mile along the water, and it is truly a pretty sight with all of God's nature around.

Okay...on with the business of cardmaking...I bet you thought I was on vacation or something, didn't you? Nope, just up to my ears in designing Clear Dollar Stamps sneak peeks for their March 1st release -- but oh, what fun! There are some beautiful and whimsical stamp sets coming out, and I'll be sharing those the last four days of this month with you, so I hope that you come back to visit for that.

I will have a new card that I can share with you this weekend, however! My fellow team designer from CDS, Alex Maldonado will be hostessing the Clear Dollar Stamps Weekend Color Challenge over on the Paper Craft Planet, and I will be participating in that! I have 4 March birthday cards to make, so that will afford me the opportunity to get started on those! See you back here this weekend!

Monday, February 2, 2009

"Sweet Pea x 2!!


Good morning! Today, I'm sharing card that I've made for a dear friend that is a fellow "Dork Sister" on SCS (Splitcoast Stampers Community). Her name is Leona Carver and she is expecting twin baby girls VERY shortly. And! Leona, if you're peeking at this, shame on you!! The stamp set that I used to make this card did not have anything remotely useful for twins...so, I improvised! After stamping "Sweet Pea", I added "x 2" in handwritten black gel pen ink. I envisioned a pea vine all around the card, and not having a stamp for that, either, I took on the task of drawing by hand the vine, trills and berries (not that pea vines have berries, but I kind of liked the way that it looked, and kept it! LOL) In the second photo, you can see a close-up of the vine drawing. The beauty of stamping world, is that everything is okay! ; ) Okay the deets:

Stamps Used: Fiskars Baby Stamp Set
Cardstock: Colormates Medium Glorious Green, Pink & White Striped Scrapbook Paper, Paper Trey White Cardstock
Ink: Stazon Black Ink, Stampin' Up! Garden Green, Pretty in Pink, Rose Romance Inks
Markers: Copic Sketch Markers - RV11 Pink, RV29 Crimson, G21 Lime Green, YG67 Moss, Signo White Gel Pen, Sakura Micron 01 Black Felt Tip Pen
Tools: Cuttlebug, Regular & Scalloped Square Nestabilities Dies, Regular & Scalloped Oval Nestabilities Dies, Tsukineko Sponge Daubers, Prismacolor Pencils, American Crafts Dimensionals, Adhesive, Zots, Sewing Machine, Thread
Embellishments: Offray Satin Ribbon, Spare Parts Buttons & Sequins, Green Twine
Technique: Basic Stamping, Sponging, Freehand Drawing, Machine Stitching

INSTRUCTIONS:
A white card base out of Paper Trey Cardstock was cut to 5"x10" and set aside. The card front was cut from Paper Trey White Cardstock to 5"x5". A scalloped mat was cut using Nestabilities Scalloped Square Die with Colormates Medium Glorious Green Cardstock. A square mat was cut out of the Pink & White Striped Scrapbook Paper with Nestabilities Regular Square Die. The two square die cut mats were glued together. Using a Signo White Gel Pen, I dash-doodled around the scallop points of the green mat. and set aside.

The main image was stamped onto Paper Trey White Cardstock using Stampin' Up! Garden Green and Pretty in Pink. Using Prismacolor Pencils, I colored the "Sweet Pea" bodies to make the color more intense. Using Stazon Black Ink, I stamped the sentiment and added "x2" next to "Sweet Pea" by hand using a Sakura Micron 01 pen. After sketching with pencil the sweet pea vine along the bottom of the main image oval bottom, I retraced where the pencil sketch marks were, and then using a gum eraser, erased the pencil sketching. Using Copic Sketch Markers, I colored in the leaves with two coordinating greens and then adding vine trills by hand with the Sakura Micron 01 pen. Using two different shades of pink, I colored in by hand the pink berries along the sweet pea vine. I then cut out the image using the Cuttlebug and Regular Oval Nestabilities Die. Using a Tsukineko Sponge Dauber I sponged along the edge of the cut out stamped oval using Stampin' Up! Pretty in Pink Ink. (Here's a tip when you want to draw or stamp along a die shape before cutting. Take your die, as I did the oval and trace around the edge with a pencil where the outside die edge is. Then you'll see what area you have to work with as you stamp, as as you add other stamping elements, such as a sentiment or a hand drawn element.) I die cut a green mat for the stamped, cut out image using the Cuttlebug and the Scalloped Oval Nestabilties Dies. I glued the stamped, cut out image to the green scalloped mat, and then using a Signo White Gel Pen, dot doodled along each scallop point on the green mat.

Using the same method as I used to draw the sweet pea vine on the stamped image, I drew the sweet pea vine and berries along the four sides of the card front, and then after adding vine trills as before, I colored in the leaves, and added the pink berries. The two square mats that were glued together were then glued to the center of the white cardstock front, and using my Janome Hello Kitty Sewing Machine, I stitched around all 4 sides of the pink & white striped square mat. The matted, stamped oval was then popped up on American Crafts Dimensionals over the two sewn down square mats. To embellish, I added a strip of Offray Satin Ribbon horizontally across the upper part of the card base, and then securing a matching bow to the center, I added a double button secured with green twine to the center of the bow. Using medium size sequins from Spare Parts Assorted Embellishment Packs, I glued two sequins to each "sweet pea" body. The finished card front was then glued to the 5"x10" white cardstock base.